Clinical Case: Is it possible to do more with less? Cracking the chameleon effect
Using 3M™ Filtek™ Easy Match Universal Restorative.


A predictable way to create esthetic multi-layer composite restorations for patients with localized anterior tooth wear.
A female patient presented herself with localized anterior tooth wear due to a history of nail biting. A conservative direct approach was chosen as treatment option because of mainly three reasons. Firstly, the patient was relatively young and the otherwise healthy enamel would have been damaged for treatment by means of indirect restorations. Secondly, because of her young age, we did not want to perform irreversible treatment. By choosing composite resin as restoration material, the clinical performance and esthetics could be evaluated for a long period. Any necessary repairs or adjustments could easily be performed.

Young female patient with localized anterior tooth wear

Together with the patient, the most desirable and fitting tooth shapes were chosen from the selection of the book Anteriores by Hajtó.

After confirming the tooth shapes, a quick direct mock-up with flowable resin was performed on all anterior teeth. In this way, the incisal edge position and both the horizontal and vertical plane could be confirmed immediately. A Digital Smile Design was made over the direct mock-up as final instruction for the technician.

The technician did the wax-up and made a putty key so I could do the final indirect mock-up for patient approval.

The indirect mock-up in situ.

After the patient’s approval, the wax-up was adjusted proximally on the palatal side with scalpel blade 12C. In this way, a palatal putty key could be made with well-defined proximal borders for easy shell building.

The palatal putty key with well-defined proximal borders.

In the third appointment, shade selection was done just before the direct composite restorations were made.

The teeth were completely isolated by means of rubberdam. A wave-like bevel was made for optimal transition of the final restorations.

After minimal preparation, cleaning and air-abrading was performed with AquaCare. Subsequently, the dentin was etched for 5 seconds and enamel was etched for 30 seconds. Kerr™ OptiBond™ FL was applied according to manufacturer’s instructions for use.

After bonding application, 0.5 mm palatal shells were build using the palatal putty key and 3M™ Filtek™ Supreme XTE WE shade.

The dentin layers were done with 3M™ Filtek™ Supreme XTE A2D. The middle third of the enamel was done with A2 body enamel shade.

Proximal areas were made by means of Mylar pull through technique by Newton Fahl. For the proximal ridges 3M™ Filtek™ Supreme XTE WE Shade was used.

Finally, the incisal third enamel layer was created with 3M™ Filtek™ Supreme A1E. The restorations were overly contoured.

Rubberdam was removed and primary anatomy was created according to Hajtó F08/F10.

Secondary and tertiary anatomy were made, and the restorations were polished with 3M™ Sof-Lex discs, 3M™ Sof-Lex™ Diamond Polishing System, and finally a goat hair brush with Cosmedent® Enamelize® paste. Note the dehydration of the enamel. Finally, a night guard was fabricated in the event of nightly bruxism.

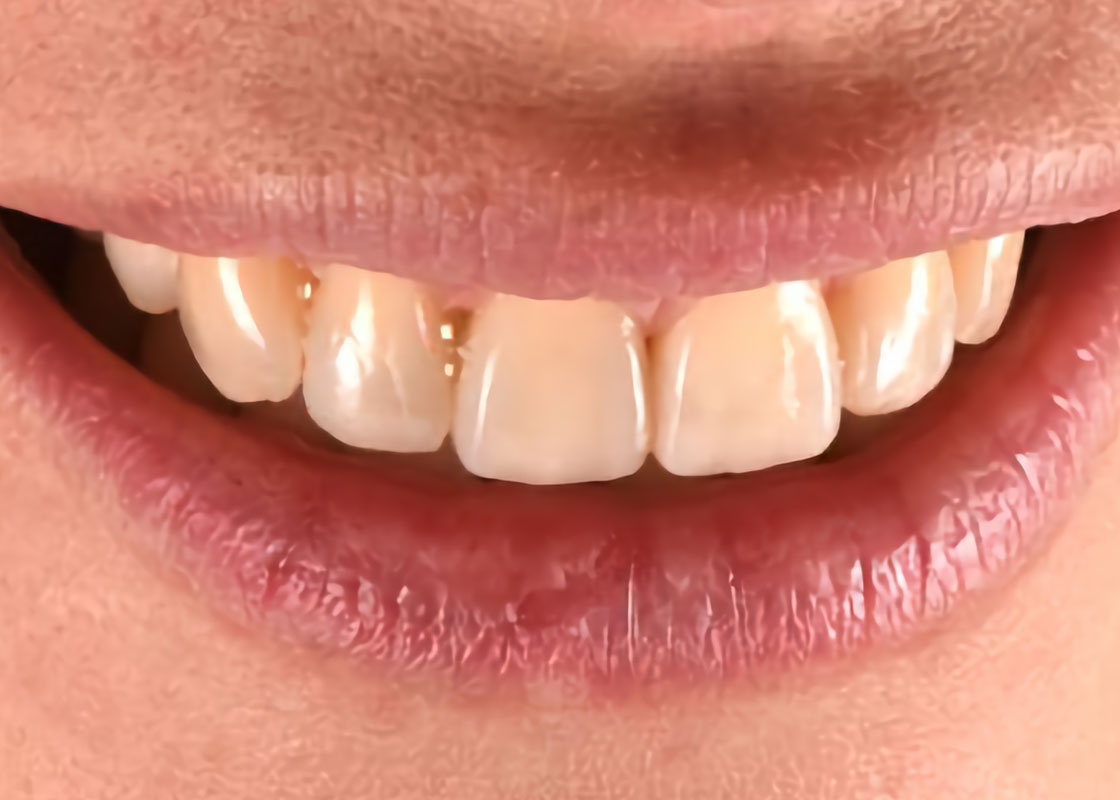
Picture after rehydration process, taken after one week. Note how the central papilla has developed itself under the contact area.

1 week post-op.

1 week post-op.
Visit www.karmadentistry.com for interesting podcasts and webinars by Freek Gols Linthorst and other KARMA members

Using 3M™ Filtek™ Easy Match Universal Restorative.

Using 3M™ Imprint™ 4 Light VPS Material, 3M™ Intra-oral Syringe, 3M™ Imprint™ 4 Heavy VPS Material, 3M™ Protemp™ 4 Temporization…

Using 3M™ Scotchbond™ Universal Etchant, 3M™ Scotchbond™ Universal Adhesive, 3M™ Elipar™ DeepCure-S LED Curing Light, 3M™ Filtek™ One Bulk Fill…