
Clinical Case: Black Triangle Closure Using Bioclear© BT Matrices
Using 3M™ Single Bond Universal Adhesive, 3M™ Filtek™ Supreme Flowable Restorative, 3M™ Filtek™ Universal Restorative, 3M™ Elipar™ Deep Cure-S LED…


Direct Anterior Solutions
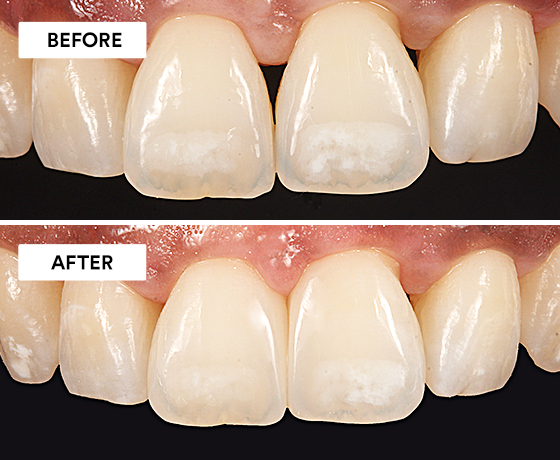
A 33-year-old female patient complained about the appearance of the existing partial composite reconstructions on her central lateral incisors.
The main challenge in this case was to create a natural looking, anatomically correct tooth shape. To simplify the procedure, we used an anterior matrix system and 3M™ Filtek™ Universal Restorative, because it was designed for the single-shade technique, and has great modeling properties and a chameleon effect for good optical integration. We used a single-shade technique, as an analysis of the adjacent teeth’s internal structure revealed no complex variations in translucency.
The team and the patient were satisfied with the overall result. Additionally, the team appreciated that the color and material integration was solved with a single-shade restoration rather than placing more opaque colors such as dentin shades. Through the creation of a natural tooth shape, a lifelike restoration was obtained.

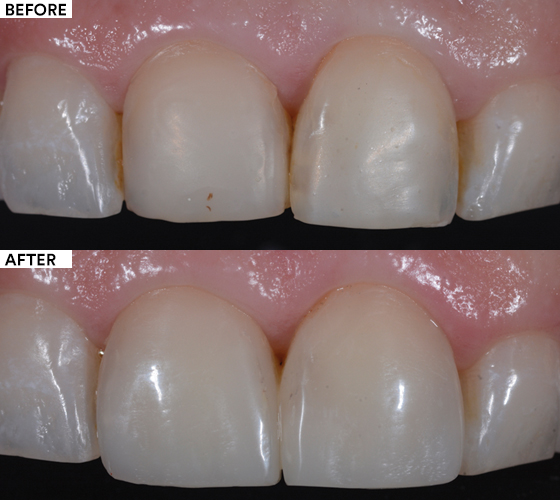
Initial situation: Composite restorations on the maxillary central incisors needed to be replaced. Composite veneers were planned.

Photo taken using a polarizing filter revealed internal structure and restorations. Dark areas in the teeth’s mesial aspect were more prominent than in the unfiltered photo.

Palatal view of the maxillary anterior teeth. Marginal integrity of the restorations was compromised and marginal discoloration visible.

Central incisors after the old restorations were removed, caries were excavated and teeth were prepared.

Two anterior matrices were placed and fixed with wedges.

Bonding surfaces were etched with 3M™ Scotchbond™ Universal Etchant. The gel was rinsed off with water after 15 seconds.

After the adhesive was applied, the interproximal and cervical areas of the right central incisor were built up with 3M™ Filtek™ Universal Restorative A2 shade, light cured, and the matrix was removed.

Palatal and interproximal aspects of the left central incisor were built up. The restoration on the right central incisor was then completed.

Appearance of the restoration immediately after the application of the last layer of composite and removal of the second matrix. The shape looked good, while the texture needed to be refined.

Photograph of the restorations and adjacent teeth was taken with the aid of polarizing filters. A relatively plain internal structure was revealed.

Restoration surface was polished with the 3M™ Sof-Lex™ Diamond Polishing System. The 3M™ Sof-Lex™ Pre-Polishing Spiral (beige) was used first.

Next, the 3M™ Sof-Lex™ Diamond Polishing Spiral (pink) was used. A natural gloss was achieved without the need for polishing paste.

Final result: The patient’s smile was restored with lifelike results.
Refer to instructions for use for complete product information. Results may vary.

Using 3M™ Single Bond Universal Adhesive, 3M™ Filtek™ Supreme Flowable Restorative, 3M™ Filtek™ Universal Restorative, 3M™ Elipar™ Deep Cure-S LED…
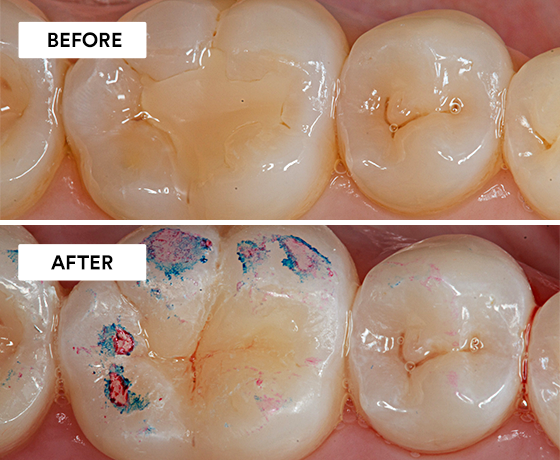
Using 3M™ Scotchbond™ Universal Adhesive, 3M™ Filtek™ One Bulk Fill Restorative, and the 3M™ Sof-Lex™ Spiral Finishing and Polishing system.
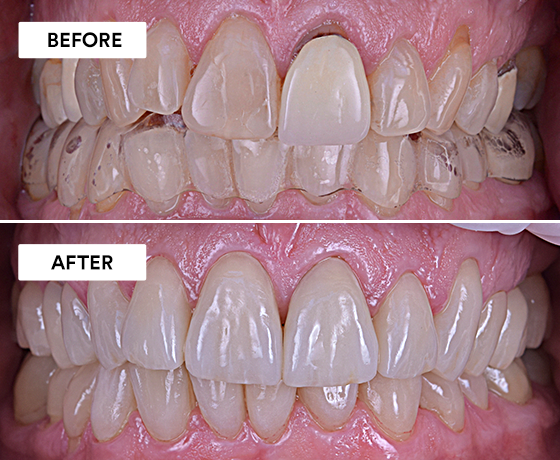
Using 3M™ Protemp™ 4 Temporization Material, 3M™ Scotchbond™ Universal Plus Adhesive, and 3M™ RelyX™ Universal Resin Cement.