
Clinical Case: Composites made easy
Using 3M™ Filtek™ Easy Match Universal Restorative.


Taking accurate impressions can be quick and easy – with the right material and technique. This article presents one possible path to clinical success.
Successful prosthodontic procedures begin with a high-quality preparation and an accurate impression. For dental practitioners, the challenge is in ensuring a high quality and accuracy without sacrificing their efficiency. I decided to meet this challenge with the aid of an innovative polyether impression material and an impression taking procedure that is highly accurate and fast, hoping that they would allow me to spend more time on the preparation.

Upper first premolar in need of a restoration after endodontic treatment. The aim was to achieve an esthetic result and to protect the weakened cusps of the premolar, which were at high risk of fracturing.

Situation after root canal treatment, try-in of two fiber posts (3M™ RelyX™ Fiber Post 3D Glass Fiber Posts size 0) and marking of their final length.

Proximal box elevation with bulk fill composite (3M™ Filtek™ One Bulk Fill Restorative) and try-in of the extraorally shortened fiber posts.

Application of 3M™ RelyX™ Unicem 2 Aplicap™ Self-Adhesive Resin Cement into the root canal using the elongation tip.

Fiber posts after cementation and core build-up accomplished with 3M™ Filtek™ One Bulk Fill Restorative in the shade A2.

Retraction and moisture control with 3M™ Astringent Retraction Paste after tooth preparation.

Complete removal of the retraction paste with water after two minutes.

Clean and clearly visible preparation margin with pilot cord in the sulcus prior to impression taking.

Syringing of the selected, quick-setting polyether impression material (3M™ Impregum™ Super Quick Light Body Polyether Impression Material) around the preparation for the 1-step impression technique.

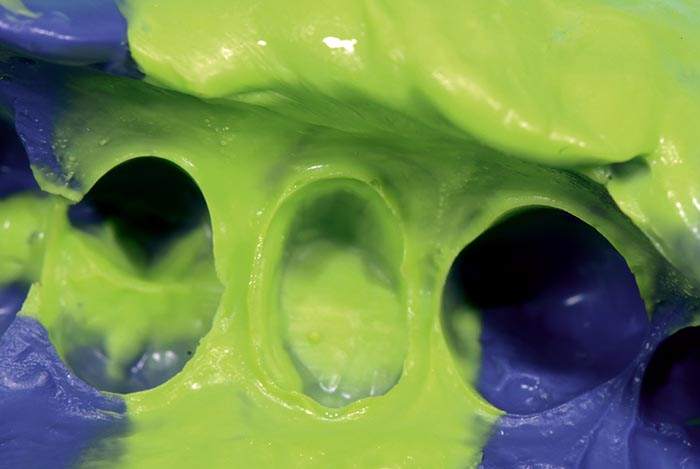
Close-up view of the final impression taken with 3M™ Impregum™ Super Quick Heavy Body and Light Body Polyether Impression Materials.

Selective etching of the enamel with 3M™ Scotchbond™ Universal Etchant for 30 seconds.

Etching of the all-ceramic restoration’s intaglio surface (IPS e.max® CAD, Ivoclar Vivadent) with 5 % hydrofluoric acid for 20 seconds.

Application of a universal adhesive (3M™ Scotchbond™ Universal Adhesive) to the prepared tooth surface.

Following air-drying for approximately 5 seconds, the universal adhesive is light cured for 10 seconds.

Application of the universal adhesive to the all-ceramic restoration for 20 seconds. The restoration was cemented with 3M™ RelyX™ Ultimate Adhesive Resin Cement.

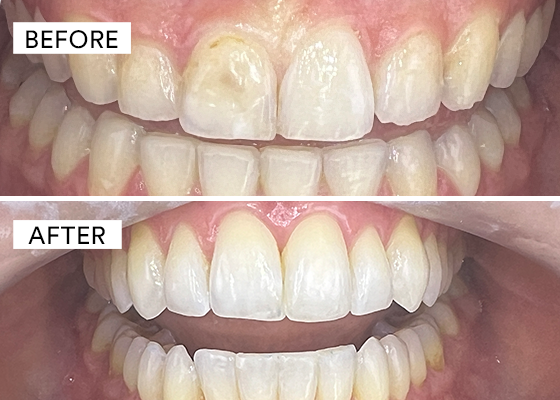
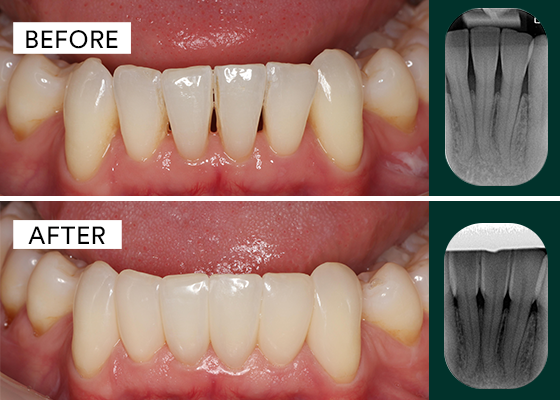
Esthetic treatment outcome: perfectly fitting all-ceramic overlay restoration immediately after placement.
The selected impression material and technique supports dental practitioners in taking highly accurate impressions in a very short time. Together with a high-quality preparation, these impressions lay the foundation for perfectly fitting restorations.

Using 3M™ Filtek™ Easy Match Universal Restorative.
Using 3M™ Scotchbond™ Universal Plus Adhesive, 3M™ Filtek™ Supreme Flowable, 3M™ Filtek™ Supreme XTE, and 3M™ Sof-Lex™ coarse and medium…

Using 3M™ Filtek™ Easy Match Universal Restorative, and 3M™ Scotchbond™ Universal Plus Adhesive.