July 18, 2022
Dr. Willemijn van Susante,

Get the bite right

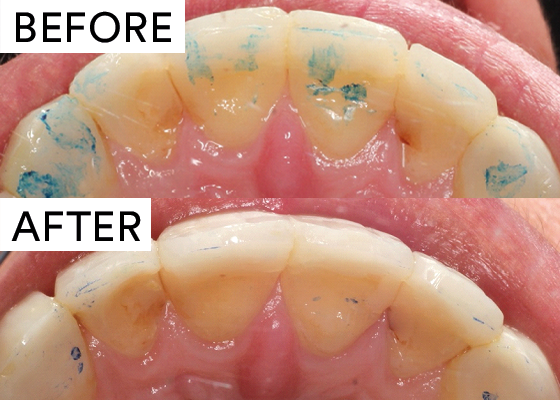
Don’t let improper occlusion come back to bite you: this critical factor can make or break the success of your procedure. Four simple tips can help you get the right bite, consistently and efficiently.

In an ideal world, every restoration would fit perfectly and have great occlusion when it comes back from the lab. Unfortunately, this just isn’t the case. Even perfect lab restorations need to be fitted properly in the patient’s mouth and for their bite. And while it can be easy to overlook, an incorrect fit may result in wear in the wrong places. This can put excessive load on the restoration, opposing teeth and even the mandibular joint, which in turn can lead to tooth mobility, discomfort or even pain. Use these four helpful tips to achieve better occlusion and get your bite right – the first time.

How to get the right bite:

Proper occlusal fit has bilateral, equal, simultaneous contact. And while there are a variety of ways to achieve the right bite, here is a simple, straightforward technique to help you get there:

  1. Use a shim stock (plastic foil measuring 12-8 microns thick)o check the patient’s existing occlusion. If the teeth surrounding the restoration do not come together with ease, other steps may be required to achieve a good bite.

    Prep
  2. Make sure you can seat the restoration completely. This is to ensure it actually fits, and to check for any major interference – after all, you can only check occlusion if the crown is in all the way! After seating the restoration, check the patient’s occlusion with shim stock. If the shim stock only holds on the restoration, then the restoration is seated too high. If the shim stock doesn’t hold, the restoration may need to be reseated.
  3. Working from the cusp to the first molar, ask the patient to bite down on 8µm articulating paper. Use blue film first, then red. Colored marks will show you where the restoration hits the opposing tooth. These marks should appear on cusps and fossae, not on inclines. You should also be able to hear the click of a proper bite.Why use both blue and red film? The blue film alone can leave misleading smudges. The red doesn’t mark as well, but you can see the marks better by rubbing petroleum jelly on both sides of the film. If the colored marks appear in the incorrect places, the crown may need to be reseated.

    Direct after placement, tapping up and down.
  4. Next, have the patient sit upright and chew horseshoe articulating paper (200µm thick). Then, with the patient reclined, look at the marks on the restoration and other teeth. Check for interference: if something is too big or in the way, fix it.Checking bite while the patient is reclined (step 3) will give you maximum occlusion. However, there can still be interference when the patient actually uses their teeth. After all, patients don’t normally chew lying down.Step 4 is a functional check that is especially important in anterior restorations. Streaks on the inside of the front teeth can signal significant problems. Never leave streaks on the palatal site of anterior restorations!


    After chewing on colored articulating paper and after adjusting interference.


    Streaks on anteriors and after removing streaks.


    Final latetral view.

Special Considerations

While the four-step technique above is appropriate for most restorations, as with most dental procedures, there are special considerations:

  • Bridges: It’s even more important for the bite registration to be correct, since bridges rely on the support teeth to absorb occlusal forces.
  • Implant-supported restorations: Depending on the location of the restoration, the implant prosthesis can create an offset load, which in turn can impact the entire implant system. In these cases, the opposing tooth may need recontouring to decrease the offset load and ensure the prosthesis doesn’t have occlusal contact.
  • Articulators: When using an articulator, consider whether you also need to make a facial registration. The two together can help you get the most accurate picture of the patients’ situation possible, and better plan out their treatment.
  • Digital occlusion testing: These tools can help you see where occlusion happens first, as well as identify imbalances and pressure points – which can be valuable information for complex cases. However, as with any tool, you need to master it first to get the most out of it.

Keep in mind that when it comes to occlusion, there is no one-size-fits-all rule. Sometimes it’s not possible to get bilateral equal simultaneous contact because of a different bite or other oral problems, and you should be prepared to change your approach.

Bringing these steps into your practice

Even small changes in your protocol can result in growing pains or even pushback. But regardless of the technique you choose, standardization will only benefit your practice and your team: when everyone uses the same papers and makes the same checks every time, together you can help ensure consistent success.

Since changing to this four-step protocol, I’ve had very few patients come back because their bite feels wrong. When you see that every patient leaves happy, it’s easy to get buy-in from the team. It also helps build confidence in your practice, your team, and in your ability to ensure a great-fitting restoration that your patient will love at first bite.

Dr. Willemijn van Susante

Learn more about Dr. Willemijn van Susante

You May Also Like

Zirconia puzzle: what makes zirconia unique and how to choose the right zirconia

Zirconia may be part of your everyday vocabulary, but how much do you know about this ceramic material? Learn more…

Contouring and Polishing Anterior Composite Restorations created with the 3M™ Filtek™ Matrix

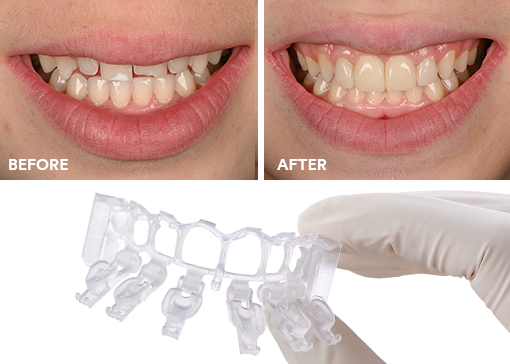
Achieving the correct shape is vital to a natural-looking anterior composite restoration. Learn how the 3M™ Filtek™ Matrix, paired with…

Simplicity at your fingertips: A template for smile makeovers

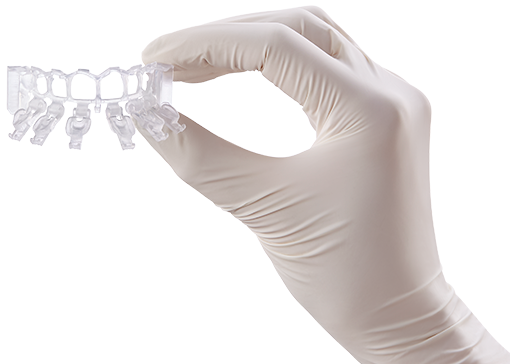
Direct composite restorative procedures can be challenging, particularly when it comes to esthetic cases. Discover how new techniques and tools…