
Clinical Case: Is it possible to do more with less? Cracking the chameleon effect
Using 3M™ Filtek™ Easy Match Universal Restorative.


Using 3M™ Sof-Lex™, 3M™ Scotchbond™ Universal Etchant, 3M™ Scotchbond™ Universal Adhesive, and 3M™ Filtek™ Supreme XTE Universal Restorative.
Personal experience shows that diastema closure with direct composite is most predictable and successful when an analysis of the initial situation and precise planning of the desired result are carried out. This task may be accomplished by taking several frontal and lateral photographs, measuring the height and width of the teeth, and virtually designing the planned restorations. In this context, it must be taken into consideration that both central incisors should be symmetrical, and that the maxillary dental midline should be coincident with the facial midline. For planning, however, the distal aspect of the canines should be the reference, and not the dental midline.
The following case is used as an example to demonstrate the procedure. This patient came for diastema closure after orthodontic treatment. Photographs were taken and a digital design was created. Subsequently, a wax up and a mock up were produced. With the aid of a silicone key, the definitive restorations were finally created.
Learn more about the products used in this clinical case
|

Initial situation after orthodontic treatment with open space between the central and lateral incisors.

Digital Smile Design: The ideal shape and proportions of the teeth are determined and the treatment outcome is planned.

Shade determination using the VITA classical A1 – D4 shade guide. It is essential to carry out this step before isolation for a realistic result. In order to ensure a precise match of the selected shades, a small amount of the selected composite may be placed on the tooth to see how it mimics the natural color.

For isolation, a rubber dam medium or heavy is used in combination with thick waxed floss. In this case, the rubber dam is fixed with floss that is tied up in the cervical area.

This technique ensures that the cervical and proximal areas of the teeth are fully available for bonding and restorative procedures while the risk of contamination with blood or saliva is minimized. In addition, a clamp may be used on the first premolars for fixation. In this case, however, the maxillary right premolar was not retentive enough for a clamp.

Removal of the aprismatic enamel with a 3M™ Sof-Lex™ Extra Thin Contouring and Polishing Disc (Coarse) at slow speed. The surface should be roughened instead of trimmed. Tooth preparation is not required.

Etching of the roughened enamel with 3M™ Scotchbond™ Universal Etchant for 15 seconds. The adjacent teeth are protected with PTFE tape.

Application of 3M™ Scotchbond™ Universal Adhesive to the tooth surfaces for 20 seconds.

Use of a suction system to ensure that a thin and uniform adhesive layer is obtained. Subsequently, a gentle stream of air should be directed towards the surface until the solvent has evaporated completely, followed by light curing for ten seconds.

Use of the silicone key produced on the wax-up model. With this tool utilized as a palatal shell, it is easy to determine and create the correct length and width of the restorations.

Utilization of a pre-shaped matrix band (Composi-Tight® M-Series Matrix Band, Garrison) to build up the mesial and distal walls. In this case, the walls are created with 3M™ Filtek™ Supreme XTE Universal Restorative in the enamel shade A3E.

Some 3M™ Filtek™ Supreme XTE Universal Restorative in the body shade A2B is added on top. In order to finalize the restoration, white tint (3M™ Sinfony™ Indirect Lab Composite system) and 3M™ Filtek™ Supreme XTE Universal Restorative in the translucent shade Grey are applied on the polymerized body, which is then covered with a thin layer of composite in the shade A3E.

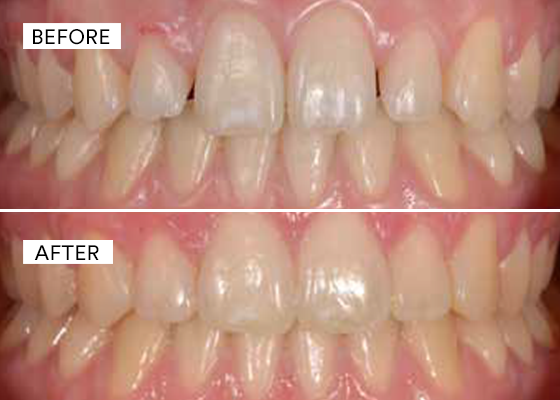
Final situation one week after the treatment with the other incisors treated in a similar manner. The tint was only used on the left central incisor. For finishing and polishing, 3M™ Sof-Lex™ Contouring and Polishing Discs as well as the 3M™ Sof-Lex™ Diamond Polishing System were used.

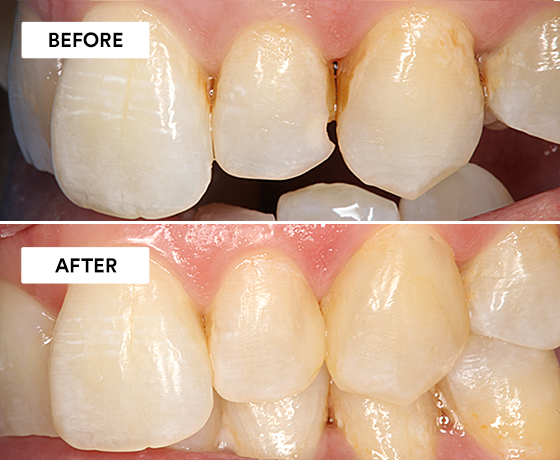
Lateral view of the second quadrant. A bit of composite was applied to the canine as well.

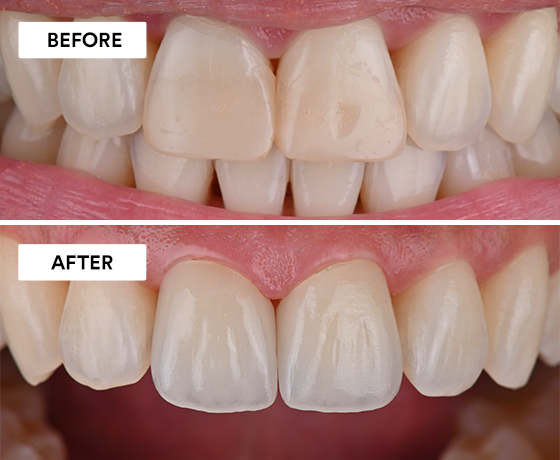
Lateral view of the first quadrant. The restorations blend in nicely with the natural tooth structure.

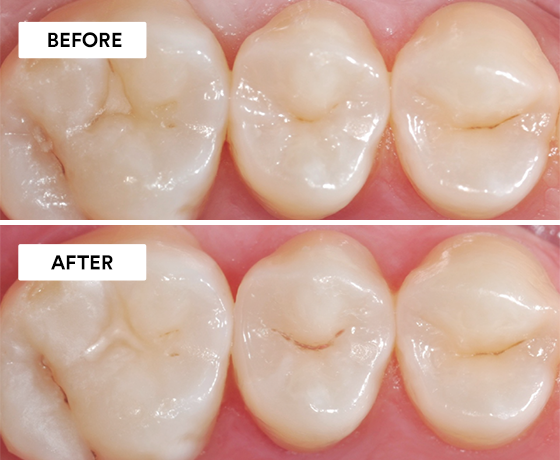
Occlusal view of the treatment result.
Refer to Instructions for Use (IFU) for complete product information. Results may vary.

Using 3M™ Filtek™ Easy Match Universal Restorative.
Using 3M™ Imprint™ 4 Light VPS Material, 3M™ Intra-oral Syringe, 3M™ Imprint™ 4 Heavy VPS Material, 3M™ Protemp™ 4 Temporization…
Using 3M™ Scotchbond™ Universal Etchant, 3M™ Scotchbond™ Universal Adhesive, 3M™ Elipar™ DeepCure-S LED Curing Light, 3M™ Filtek™ One Bulk Fill…