Clinical Case: Is it possible to do more with less? Cracking the chameleon effect
Using 3M™ Filtek™ Easy Match Universal Restorative.


Drawing “essential lines” can help successfully recreate the natural appearance of teeth in restorative dentistry.
The “essential lines” concept assumes each posterior tooth has a universal set of characteristics, or common lines. When used in combination with copying techniques, knowledge of these lines can help recreate the appearance of a tooth in restorations – especially in cases where the exact anatomy of the tooth is not available. It can also reduce the time and effort spent on creating natural-looking restorations, without compromising on quality. This concept works for all molars and premolars in the maxilla and mandible, provided the position-specific “essential lines” are used.

Drawing of “essential lines” found in mandibular premolars and molars.

Drawing of “essential lines” found in maxillary premolars and molars.

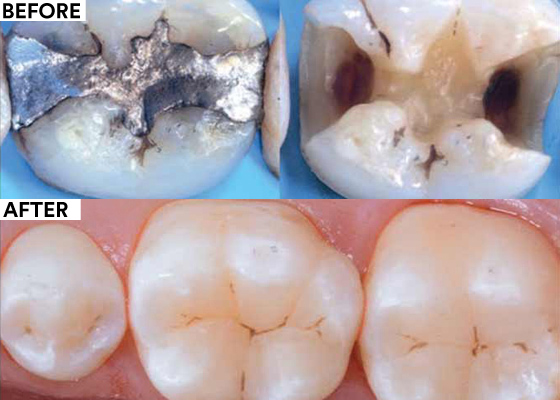
First molar amalgam replacement.

An impression is made to record the anatomy of the unrestored tooth.

After tooth preparation.

Selective etching of enamel with 3M™ Scotchbond™ Universal Etchant.

Application of 3M™ Scotchbond™ Universal Adhesive.

After build-up of proximal composite walls using the matrix system as a guide.

The prepared tooth is filled with 3M™ Filtek™ One Bulk Fill Restorative composite.

Occlusal anatomy is added to the uncured bulk fill composite.

Recommended “essential lines” to be added to the uncured composite.

The center point of the fissures is marked on the occlusal surface.

The “essential lines” are drawn from the center point to the marginal ridges.

After completion of the “essential lines” and light curing.

Composite stain is added to the “essential lines” to match the esthetics of the natural dentition.

Composite restoration after finishing and polishing with the 3M™ Sof-Lex™ Diamond Polishing System.

Final restorative result.

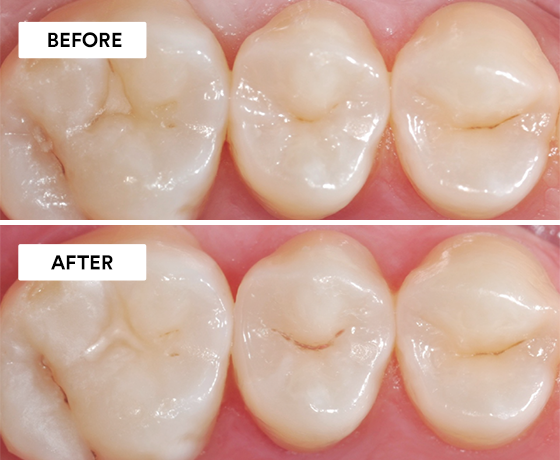
Additional example of “essential lines” applied to a mandibular first molar.
Refer to Instructions for Use (IFU) for complete product information. Results may vary.

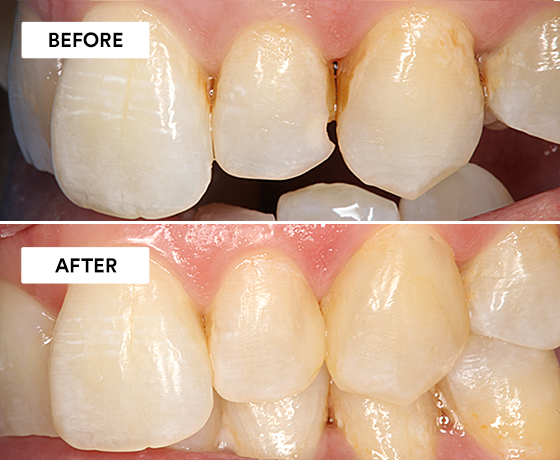
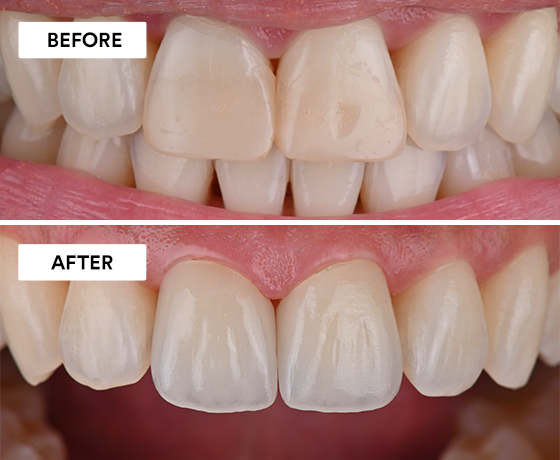
Using 3M™ Filtek™ Easy Match Universal Restorative.

Using 3M™ Imprint™ 4 Light VPS Material, 3M™ Intra-oral Syringe, 3M™ Imprint™ 4 Heavy VPS Material, 3M™ Protemp™ 4 Temporization…

Using 3M™ Scotchbond™ Universal Etchant, 3M™ Scotchbond™ Universal Adhesive, 3M™ Elipar™ DeepCure-S LED Curing Light, 3M™ Filtek™ One Bulk Fill…