
Clinical Case: Is it possible to do more with less? Cracking the chameleon effect
Using 3M™ Filtek™ Easy Match Universal Restorative.


Using 3M™ Filtek™ Supreme XTE Universal Restorative, 3M™ Scotchbond™ Universal Etchant, 3M™ Scotchbond Universal Adhesive, 3M™ Sof-Lex™ Extra-Thin Contouring and Polishing Discs, and 3M™ Sof-Lex™ Diamond Polishing System.
Direct freehand restoration of anterior teeth with resin composite can be challenging especially when many different shades and opacities of a material are used. With no clear guidance regarding the shape and thickness of each layer applied, too much volume is often built up. In this case, the desired shape is usually obtained after contouring and finishing, but the shade match with the natural tooth structure is often compromised.
A strategy that enables the dental practitioner to gain control of the shape and layer thickness during the restorative procedure already is the simplified dual-layer technique developed by StyleItaliano. An individual shade guide created with the same materials that are also used in the mouth, a silicone index and an instrument that aids implementation of a final enamel layer thickness of exactly 0.5 mm make life easier for the dentist. As shown below, using these tools in the correct way leads to predictable and beautiful results.
Learn more about the product used in this clinical case |
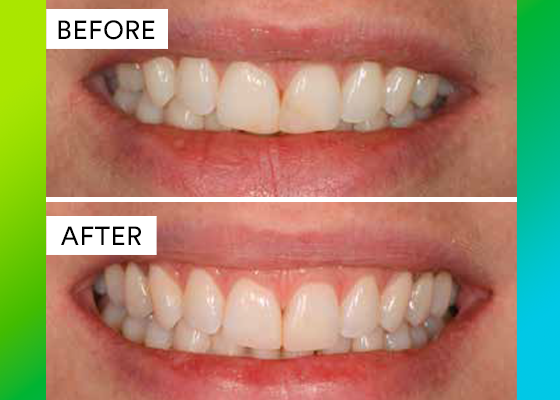
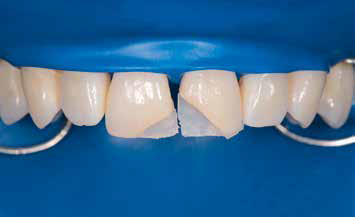
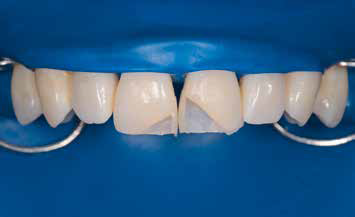
42-year-old female patient with a history of trauma to the maxillary central incisors. The fractured teeth had been restored several times in the past 30 years.
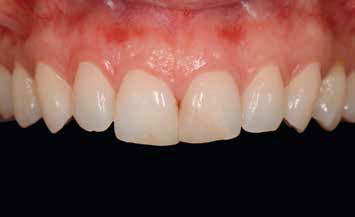
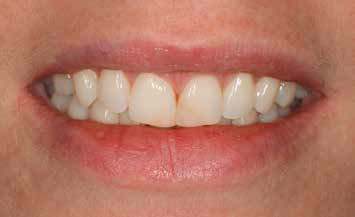
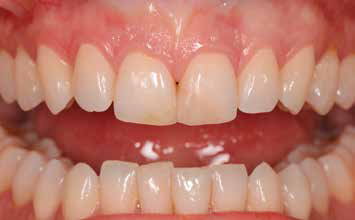
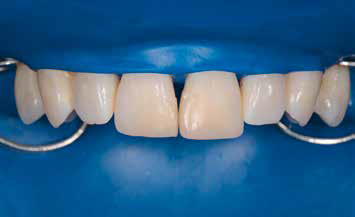
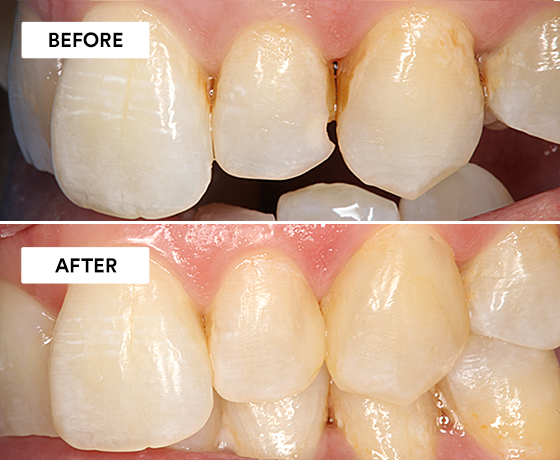
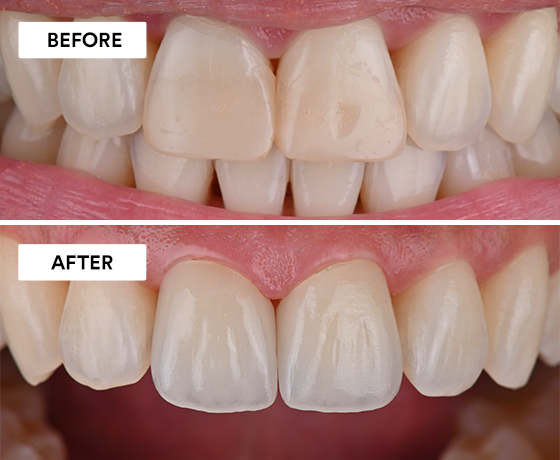
Initial situation showing discolored restorations and a mismatch in the length of the central incisors. It was decided to replace the insufficient restorations.
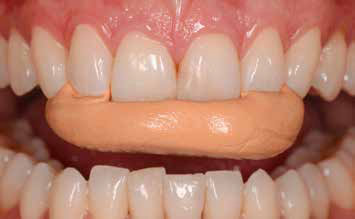
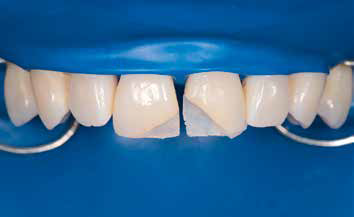
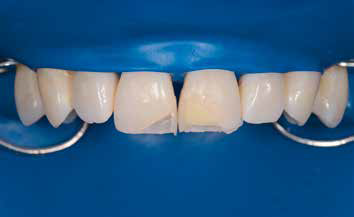
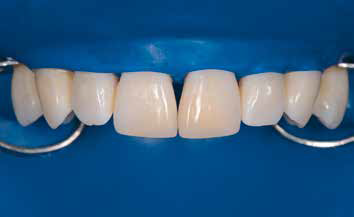
In order to provide the conditions for a symmetrical and beautiful treatment outcome, a direct mock-up was created by adding a bit of composite to the shorter left central incisor. This procedure generally works with any resin composite.
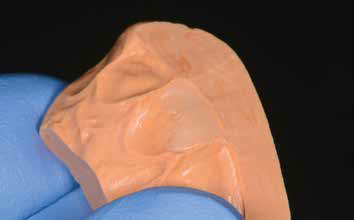
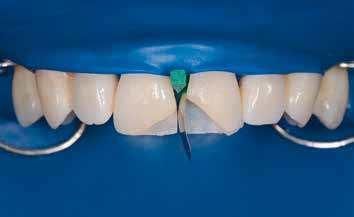
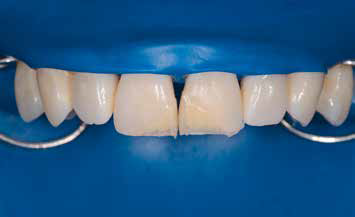
Production of a lingual matrix (silicone index) derived from the direct mock-up. It is also possible to use the existing restorations (if properly contoured) or a model with wax-up (whenever complex modification is needed) as a basis.
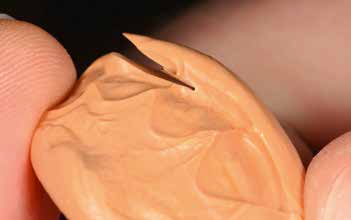
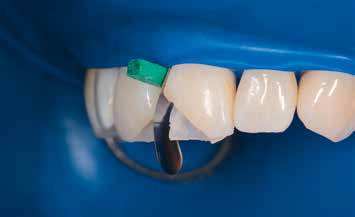
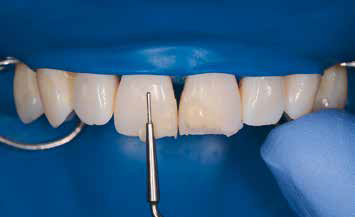
Silicone index: Cutting away the putty that is overlapping the labial part of the teeth with a scalpel (mid-incisal cut).
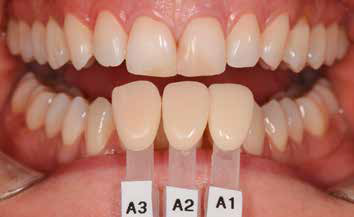
Shade selection with an individual shade guide created using the preferred material (3M™ Filtek™ Supreme XTE Universal Restorative) and StyleItaliano recipes. The selected shade is A2, created with the composite shades A2D and A3E.
Situation after rubber dam placement and removal of the existing restorations. A long and irregular bevel is created in order to provide for a good optical integration of the planned restorations.
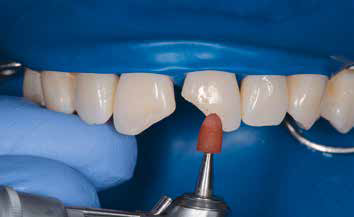
Polishing of the bevel to facilitate proper adaptation of the restorative material.
Etching of the enamel with 3M™ Scotchbond™ Universal Etchant for 15 seconds. It is essential to always etch beyond the preparation to ensure a good margin quality.
Silicone index with a 0.5 mm thick layer of 3M™ Filtek™ Supreme XTE Universal Restorative in the enamel shade (A3E) applied for the build-up of the palatal wall. It is useful to mark the restoration margin on the index with a sharp instrument beforehand.
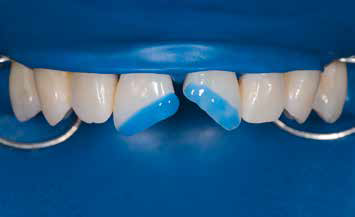
Light-cured palatal wall of the left central incisor built up with composite after the application of 3M™ Scotchbond Universal Adhesive according to the manufacturer’s instructions for use.
Situation after build-up of the right central incisor’s palatal wall in the same manner.
Checking the contour of the teeth, it became evident that the wall on the right incisor needed a slight modification. The task was accomplished using 3M™ Sof-Lex™ Extra-Thin Contouring and Polishing Discs.
Vertical placement of a posterior matrix band (Composi-Tight® M-series matrix band, Garrison), which is held in place with a wedge.
The lateral view reveals how well the shape of the proximal wall is defined by the matrix band.
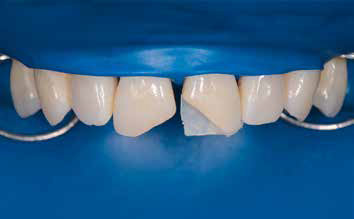
Proximal shells created with 3M™ Filtek™ Supreme XTE Universal Restorative in the shade A3E. The thickness is again 0.5 mm.
Build-up of the dentin core with 3M™ Filtek™ Supreme XTE Universal Restorative in the shade A2D.

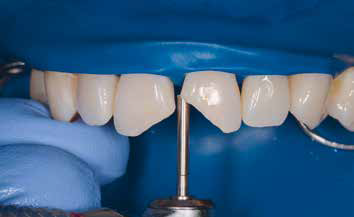
Use of the Misura instrument (LM-Instruments) to create the space needed for a final enamel layer of exactly 0.5 mm thickness.
Thickness calibration on the right central incisor.
Dentin cores with mamelons ready to be covered by enamel material.
Result of the layering procedure with only one dentin and one enamel shade of 3M™ Filtek™ Supreme XTE Universal Restorative.

Preparations for finishing and polishing: After the removal of gross excess with coarse diamonds, the line angles, incisal edges, incisal embrasures and texture are marked on the labial surfaces.
Result of the contouring procedure with Sof-Lex™ Extra-Thin Contouring and Polishing Discs coarse/medium, a fine flame-shaped diamond and medium-grit blunt rubber-based polishers, and polishing with the 3M™ Sof-Lex™ Diamond Polishing System.
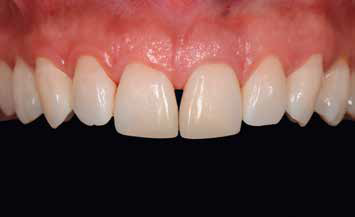
Treatment outcome immediately after finishing and polishing.
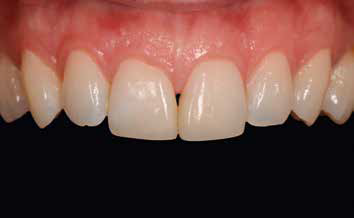
Situation after two weeks with recovered soft tissues and rehydrated tooth structure resulting in a very good optical integration of the restorations.
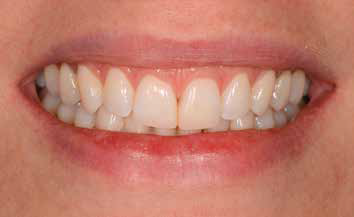
Final frontal view.
Refer to Instructions for Use (IFU) for complete product information. Results may vary.

Using 3M™ Filtek™ Easy Match Universal Restorative.
Using 3M™ Imprint™ 4 Light VPS Material, 3M™ Intra-oral Syringe, 3M™ Imprint™ 4 Heavy VPS Material, 3M™ Protemp™ 4 Temporization…
Using 3M™ Scotchbond™ Universal Etchant, 3M™ Scotchbond™ Universal Adhesive, 3M™ Elipar™ DeepCure-S LED Curing Light, 3M™ Filtek™ One Bulk Fill…