
Clinical Case: Dual Shade in Class IV Composite Replacement
Using 3M™ Scotchbond™ Universal Adhesive and 3M™ Filtek™ Supreme Ultra Universal Restorative.


Using 3M™ Scotchbond™ Universal Adhesive, 3M™ Filtek™ Supreme XTE Universal Restorative, 3M™ Elipar™ DeepCure-S LED Curing Light, 3M™ Sof-Lex™ Contouring and Polishing Discs, and 3M™ Sof-Lex™ Diamond Polishing System.
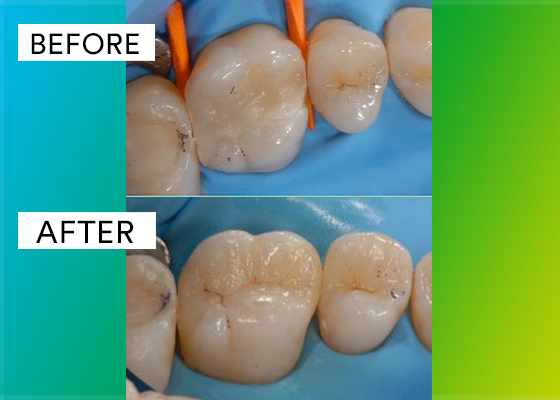
A previous restoration lacked sufficient proximal contact, making it difficult for the patient to floss and resulting in gingival irritation and occasional bleeding. The challende was to achieve better anatomy and contour to allow for improved occlusion and optimal flossing.
Learn more about the products used in this clinical case |

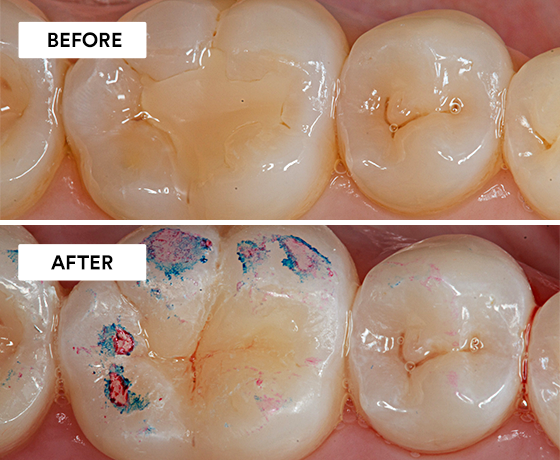
Food impaction was found in the mesial sulcus, indicating inadequate contacts were achieved when the previous composite restoration was placed.

Prepared tooth after removal of the old composite restoration.

After a 15-second selective enamel etch with 3M™ Scotchbond™ Universal Etchant, 3M™ Scotchbond™ Universal Adhesive was applied and scrubbed into the surface for 20 seconds.

After gently air drying for 5 seconds, the adhesive was light cured* for 10 seconds using a 3M™ Elipar™ DeepCure-S LED Curing Light.

A sectional matrix was positioned. 3M™ Filtek™ Supreme Flowable Restorative was placed on the cavity floor, and the proximal walls were created using 3M™ Filtek™ Supreme XTE Universal Restorative, shade A3 Enamel, and light cured.*
Clinical Tip:
Transform any Class II into an easy-to-restore Class I by creating thin proximal walls using sectional matrices. Once the walls are cured, the matrices can be carefully removed, offering a clearer view of the tooth restored.

Incremental build-up of dentin layer with 3M™ Filtek™ Supreme XTE Universal Restorative, shade A3D, and light cured.*

Placement of final enamel layer with 3M™ Filtek™ Supreme XTE Universal Restorative, shade A3E, and light cured.*

Fissure characterization of the uncured composite using brown stain followed by light curing of the composite.

Finishing of restoration using different grits of 3M™ Sof-Lex™ Contouring and Polishing Discs.

The 3M™ Sof-Lex™ pre-polishing spiral was used to prepare the restoration for final polishing.

A high gloss polish was achieved using the 3M™ Sof-Lex™ Diamond Polishing Spiral.

The final natural looking restoration immediately after finishing and polishing.
Refer to Instructions for Use (IFU) for complete product information. Results may vary.
* Light cured according to the manufacturer’s guidelines

Using 3M™ Scotchbond™ Universal Adhesive and 3M™ Filtek™ Supreme Ultra Universal Restorative.
Using 3M™ Single Bond Universal Adhesive, 3M™ Filtek™ Supreme Flowable Restorative, 3M™ Filtek™ Universal Restorative, 3M™ Elipar™ Deep Cure-S LED…
Using 3M™ Scotchbond™ Universal Adhesive, 3M™ Filtek™ One Bulk Fill Restorative, and the 3M™ Sof-Lex™ Spiral Finishing and Polishing system.